Friday, February 21, 2014

Good Food Friday: Grain Free Bread (Almond and Coconut Flour Bread)

I know, the name says it all.

Grain-free bread?

Doesn't even the most basic definition of bread involve, well, grain?

Yes.  And all of my homemade bread recipes involve all kinds of combinations of grains.  Rice. Quinoa. Oat...


But not this one.  I have been experimenting with almond flour for years.  Years.  And most of my recipes have been, honestly, barely edible by my definition (but not by the rest of the household, thankfully!).  This one was a success on its first attempt and verified in the weeks since.  I don't really follow all the eating styles and labels on foods theses days so I don't know who can enjoy this but it sure is a treat around here.  A nice slice with a bit of coconut oil has been my comfort food lately!


Grain Free Bread (Almond Coconut Flour Bread)


Ingredients:

  • 1 1/2 cups blanched almond flour
  • 1/2 cup coconut flour
  • 1/4 cup ground flax seeds
  • 3/4 tsp baking soda
  • 1/2 tsp salt
  • 1 Tbsp xylitol (you can use honey or sugar as well)
  • juice of 1/2 a lemon
  • 4 eggs
  • 1/2 to 3/4 cup water
Directions:
  • Preheat the oven to 350* F and grease a *slightly smaller glass loaf pan* with coconut oil. 
  • Combine dry ingredients and mix well.  Add lemon and eggs and mix well.  Start with the 1/2 cup water and mix until the dough resembles a stiff cake batter.  
  • Scoop batter into the loaf pan and smooth with wet finger or a wet spatula.  Don't worry, it will rise and fill more of the pan, I promise.   Bake for 35 minutes.  
  • Allow to cool.  Slice in pan.  Keep covered when stored.
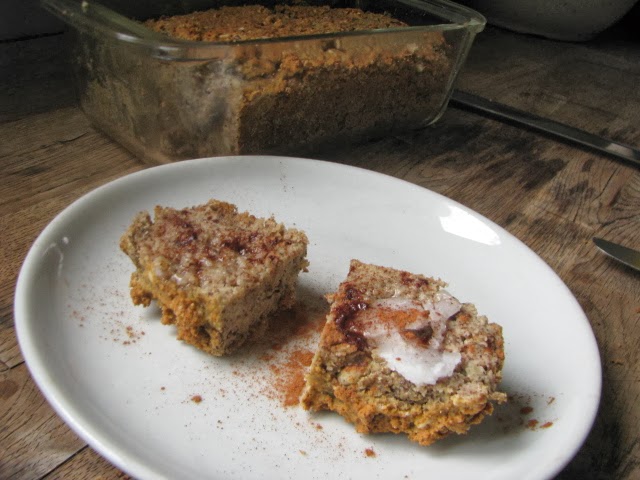
This bread blew me away in the fact that unlike so many of the gluten free breads it continued to stay moist until the very last slice, about a week!  If you know gluten free bread, that is a miracle!  


Also, this is not a sweet bread.  If you like your stuff more on the sweet side, double the sweetener, or top with raw organic honey and a sprinkle of cinnamon (my preference)!


** Here is what I mean about the slightly smaller loaf pan.  Although both pans say 1.5 quart, this loaf was
baked in pan on the left.  It looks slightly more narrow than the one on the right.  Am I crazy?  By about an inch.   I bake all my gluten free loaves in this smaller pan because they tend to get a better rise.


Friday, February 14, 2014

Vegan Gluten Free Kani Salad

Remember Good Food Friday?

Well I am happy to say we have still been eating plenty of good food just not posting our recipes.  This has to change.  Not only so we can share our inventive eats but so we can have a record of them too.  Oh how many times I have searched my own blog for my own recipe!

This one is new to me.  Kani salad.  Ever heard of it?  Introduced to me this past weekend by some food adventurous friends.  It's basically cucumber and crab with spicy mayo. But it is never real crab at these places.  No.  That fake stuff. Made with random pulverized fish, weird food starches, poor quality vegetable oils and probably MSG? Definitely not on the gluten free or real food list.  So here is a cleaned up version.


(Excuse the terrible phone photo.  Next time I promise to snap a shot with my real camera
 before I devour.  But trust me, it's beautiful...)

Spicy Kani Salad


Ingredients:
  • cucumber, julienne (I use this handy tool)
  • vermicelli rice noodles, cooked and cooled  (I tend to keep this on hand soaking in the fridge.)
  • vegan mayo - I used Vegenaise (or my Creamy Garlic Tofu Dressing, to follow)
  • sriracha
  • brown rice vinegar
  • sesame seeds
Directions:
  • Toss cucumber and noodles. I tend to always use more veggies than noodles.
  • Top with a dollop of mayo, a squirt of sriracha and a splash of vinegar and a sprinkle of sesame seeds. Toss to coat evenly.   Adjust to taste!
I think the noddles basically nail the texture of fake crab, if fake crab could be considered desirable, if only for texture. This is pretty basic but I think it would be fun to add shredded carrot for more color, or tuna for protein, all on a bed of lettuce for a meal.  Some versions add mango for a slightly sweet yet spicy side dish.


And it always tastes better when eaten with chopsticks!

******************************************************

Creamy Tofu Garlic Dressing


Ingredients:
  • 8 oz organic tofu
  • 2 Tbsp cider vinegar
  • 1 Tbsp lemon juice
  • 1 Tbsp Braggs liquid aminos
  • 1 squirt mustard
  • 1 clove garlic
  • 1/4 cup organic olive oil 
  • 1/3 cup water
Directions:
  • Blend first 7 ingredients in a blender.  I used my Vitamix but I'm sure this would work in any decent blender. With blender running, slowly add oil in a thin stream.  Then add water the same way until you reach desired consistency.  It will look questionable a few times but it will come together in a beautiful creamy sort of way.
Use this as a dip base or as a mayo replacement.


Friday, July 12, 2013

Good Food Friday: Dutch Oven Balsamic Vinegar Sirloin Tip Roast

I seriously think this was the best roast I ever made. Seriously.

It was amazing. The secret? The rub. Balsamic Vinegar and rosemary spice rub. Even my non-roast loving family members loved this roast. 

Finished roast

What you need:

  • 3.5 lb Grassfed Sirloin Tip Roast
  • 1 - 2 Onions (depending on size and taste preference)
  • 2 - 3 Carrots sliced
  • 3 - 5 Red Skin Potatoes cubed
  • Rub (mixed in a separate bowl)

For the rub:

  • 2 Tbsp organic extra virgin olive oil
  • 2 Tbsp balsamic vinegar
  • 1 tsp dried oregano
  • 1 tsp dried rosemary (mine is crushed)
  • 1 pinch of powdered thyme 
  • 1/2 tsp black pepper
  • 1/2 tsp sea salt
If I had had fresh spices for the rub I would have used them but my herb garden is in transition right now (read between the lines it was ripped out because of weed over growth). 

Instructions:
Heat oven to 250. 

On your stove top using your dutch oven heat oil (I used about 1 Tbsp of bacon grease and 1 Tbsp of Coconut oil) and sauteed the onions until clear and added the sliced carrots as the onions started to brown. 

While doing that I rubbed the spice & balsamic mixture all over the roast and let it sit. 

When veggies are getting soft and look like below remove from your pot and set aside. 

Add more oil if necessary to the pot (I added a little more coconut oil) and brown your meat on both sides. About 5 minutes or so each side. 

Remove meat when browned and add potatoes, the cooked veggies, then meat to the dutch oven. 

Cover with lid and place in oven. Cook for 60 minutes. Remove lid and cook for another 30 - 40 checking for desired done-ness (is that a word?). I personally think meat should be medium. 

Remove meat and let rest for 5 or more minutes and slice against the grain. Serve.

Cooked vegetables

Roast with rub

Browning meat

Vegetables added back to pot before roast went on top.
Amazing flavors and tender, not over cooked, grassfed healthy meat. What is your favorite way of cooking a roast?!

Recipe inspiration and rub recipe (they grilled theirs):
http://purelyprimal.com/2011/05/23/balsamic-sirloin-tip-roast/


Monday, January 28, 2013

Advent Calendar 2012

Every year after Christmas I carefully take down and store our advent calendar because I always plan on using it the following year.

And at the beginning of the next Christmas season I make a new advent calendar.

I can help it.  I'm a compulsive crafter.  

(You can see our 2010 calendar here and our 2011 calendar here.)

This year I wanted to use the silhouette.  

And chicken wire.

And old fencing.  

This is what we celebrated with this year.


Each tag is actually a pocket which held our daily activity.   


The pockets have a front piece and a back piece that were sewn together.  (Did I mention that I also wanted to use my sewing machine?)  


 We used ribbon and twine to tie the tags to the chicken wire.


 I made the frame with some old fencing and staples.


Definitely my favorite yet.  This may actually be fantastic enough to ward off my craft addiction and need to reinvent the advent calendar next December.  Perhaps I could pour the effort into homemade stockings... or a tree skirt... or ... hmm...

*****************************************************


P.S. I have already uncovered my Valentine's Countdown Calendar already.  Come on February!


Saturday, January 12, 2013

Pinspiration and a Happy Handmade Christmas: the Boys

Pinterest can be a bit... girly.

Pink.  Cute.  Ruffles.

Shoes.  Scarves.  Hair.

Cookies.  Cakes.  Suppers.

You have to really hunt for the boys stuff.  But when you find it, oh, it's good.

This year for Christmas the boys got two necessary things for boys...

Beards.


Yes, this is a picture of me... 

finishing the beards... 

late at night... 

or early in the morning... 

giddy and greasy haired.

It was knitted with some crazy yarn by a pattern of my own.  Since it fit me, it was a bit large on their little faces so I'll have to spend another evening knitting some more.  Maybe I'll wear this one when I'm doing chicken chores or getting the mail.  Might cause some neighbors to do a double take.  Fun.  


and bows and arrows.


(tutorial here)

I will say, these little things shoot far!  I'd say 20 feet. Unbelievable.  Also after a couple days of normal boy usage the dental floss tend to get stretched out but its easy to swap out.  I got to use my wood burning tool again to freehand some tribal-ish designs.

I also did a t-shirt for a boy who got a real pair of youth boxing glove (for use on our heavy bag, not his siblings!)  His shirt is a white print on a black shirt of gloves hung around his next and the distressed word CHAMP on the back.  I think it is his new fav.  Yay!


(another blurry Christmas morning photo... 
what can I say?  We are up sooo early...)

My first total success.  Every child got a handmade gift.  Hope I just started a new tradition!


Related Posts Plugin for WordPress, Blogger...